

An evidence informed, community-driven technical model for teaching, observing and improving the sprint start without turning athletes into copies of one another.
The central coaching idea is simple: the blocks should place the athlete in a position from which they can produce a large forward impulse, leave with useful horizontal speed, land the first step in a position that allows another strong push, and continue accelerating. Judge the start by the acceleration outcome it produces for that athlete.
01 · Coach first
Summary
There is no single set of block angles or joint angles that every fast sprinter should reproduce. The strongest evidence supports an individualised, outcome based model: establish a sensible starting configuration, create strong horizontal force through both blocks, extend powerfully through the hips, minimise unnecessary flight, land the first step close to or behind the vertical projection of the centre of mass, and judge changes by acceleration performance rather than appearance alone.
Push the Track Away
High horizontal force and power against the blocks are consistently associated with better block performance. Both legs matter. The front leg normally pushes for longer; the rear leg can make an important early contribution.
Land Ready to Push Again
The first flight should not become a jump. Better sprinters tend to spend less time in flight and position the first contact further behind the centre of mass, supporting effective horizontal force.
Change One Thing, then Time It
Block position, rear knee angle and loading strategy respond differently between athletes. Immediate biomechanical feedback and individual adjustment improved 10 m performance in seven of eight junior sprinters in an intervention study.
Who This Guide Is for
This guide is for healthy sprinters who have passed puberty and use standard starting blocks. It assumes access to a track, spikes, basic video and timing.
Adapt the setup and training for children, beginners, Para athletes and athletes returning from injury. Most research involves trained male sprinters, so interpret the numbers in the context of each athlete.
02 · The performance model
What an effective block start is trying to achieve
The start can be understood as a linked sequence rather than a collection of poses. Each phase should make the next phase easier. A beautiful set position that produces poor force is not useful; a powerful block exit that causes a long airborne phase or overstriding first step is also incomplete. The evidence therefore favours evaluating the whole sequence through at least 5 m and preferably 10 m.
Explore the Block Start in 3D
Open the interactive 3D block start in a new tab
The Technical Model at a Glance
| Phase | What the athlete is trying to do | Useful reference values | What the coach should see | Avoid coaching |
|---|---|---|---|---|
| Set position | Create a stable position from which both legs can push hard and forward. | Front knee values in high level studies commonly cluster around roughly 90° to 100°. Rear knee values commonly sit around roughly 110° to 130°, but successful athletes vary considerably. | Feet loaded firmly into the plates. Hips high enough to create useful leg angles. Shoulders close to or slightly beyond the line. Arms straight and stable. No rocking. | Forcing every athlete to identical angles. |
| Response | React to the sound without guessing, then begin force production rapidly. | Elite reaction times are commonly around 0.120 to 0.150 s. Under World Athletics rules, a reaction time below 0.100 s is treated as a false start. | Stable set before the signal, then immediate coordinated hand release and leg push. | Anticipating the gun or treating reaction time as the whole start. |
| Block push | Accelerate the centre of mass forward by producing large horizontal impulse through both blocks. | Total block push in trained populations is often roughly 0.34 to 0.40 s, depending on definition and ability. | Rear leg contributes early; front leg continues pushing. Hips travel forward through the push. | “Get out as fast as possible” if it makes the athlete cut the push short. |
| Block clearance | Leave with high horizontal velocity while preserving a position from which the first step can be effective. | Modern studies report centre of mass velocity projection angles around 10° in some high level samples. This is not the same measurement as trunk angle or the traditional “45° body angle.” | Strong hip extension, forward projection, active arm split and no obvious upward jump. | Holding the torso at an arbitrary 45° angle. |
| First flight | Move quickly to the first ground contact without wasting time airborne. | World class male data have shown first flight around 0.045 s versus about 0.064 s in elite comparison athletes. | Low, quick repositioning of the swing leg. | Reaching for a long first step. |
| First contact | Place the foot so the athlete can immediately produce useful backward force against the ground and continue accelerating. | High level first contacts are often around 0.18 to 0.23 s. Faster athletes can have longer contacts than slower athletes during these first steps. | Foot lands beneath or behind the vertical projection of the centre of mass, rather than reaching well in front. | “Quick feet” if it reduces force and cuts contact short. |
| Early acceleration | Repeat strong pushes while speed increases and the body rises gradually. | No fixed number of low steps is supported as a universal rule. | Step length grows naturally, flight remains controlled, posture rises progressively and arm action stays coordinated. | Staying artificially low or forcing a predetermined first step length. |
Block Setup: Find a Starting Point for Individual Testing
A 2023 experiment with 36 sprinters manipulated the front block distance from 50% to 70% of individual leg length while keeping the distance between blocks at 45% of leg length. Shorter front block settings, especially around 50% of leg length, produced greater rear block force and impulse and better start performance without increasing total block time. This provides a useful testing range for individual comparisons.
A new 2026 finite element study of 28 elite sprinters adds an important caution. Block configurations previously associated with better performance, including a 50/45 leg length configuration, also altered modelled internal tibial loading, with sex dependent responses. The study cannot establish injury causation, but it reinforces an important coaching principle: the most aggressive performance setting is not automatically the best long term setting for every athlete.
A Setup to Test: 50 / 45
Distances expressed as a percentage of the athlete's leg length. The front block is closer to the start line; the rear block sits further behind.
Configuration studied by Cavedon et al. (2023). Diagram illustrates the proportions; plate angles and hardware are schematic. Consult the study's measurement protocol before reproducing its setup. Assess this configuration through individual testing.
Footplate Inclination
Start around 40° on each plate
Measure from the flat track to the surface the foot presses against. Set and record the two plates separately. Move a slider to explore flatter and steeper settings; the diagrams animate between angles. The 30–70° controls are an exploration range, not a recommended range.
Explore tested configurations
Mero et al. changed both plates together. The shallower condition produced greater block-exit velocity (3.39 versus 3.30 m/s) in nine male sprinters. Study details.
Front plate only · Guissard et al.
The front-plate experiment favoured shallower inclinations for start velocity without a longer push. These buttons change only the front plate; the rear slider remains your chosen setting and does not reproduce the study's full setup. Read the study.
Choose a study preset or adjust either slider.
Further from the start line
Flatter settings have improved block-exit speed in experimental comparisons, alongside changes in calf muscle-tendon behaviour and ankle power. Check how the athlete carries that speed into the first contacts: a controlled flight, useful landing position and continued acceleration. These studies do not establish a fixed effect on first-step length or contact time.
Closer to the start line
Flatter settings have improved block-exit speed in experimental comparisons, alongside changes in calf muscle-tendon behaviour and ankle power. Check how the athlete carries that speed into the first contacts: a controlled flight, useful landing position and continued acceleration. These studies do not establish a fixed effect on first-step length or contact time.
As the athlete develops, review the settings when their strength, ankle mobility or start technique changes. Adjust one plate at a time by a small available increment, allow familiarisation, then compare several starts using comfort, side-on video and 5–10 m times. Retain a change when the athlete can reproduce an effective start. Progression does not require a steadily flatter or steeper plate; the two plates can be adjusted independently.
In nine male sprinters, a 40° block plate condition produced greater horizontal block velocity than a 65° condition, apparently through more favourable ankle muscle tendon behaviour and greater ankle moment and power. The 2022 review consequently identifies lower footplate angles around 40° as a setting worth exploring and cautions against very steep angles above about 65°. Individual comfort, ankle mobility and block design still matter.
Guissard, Duchateau and Hainaut (1992) also tested front plate inclinations of 30°, 50° and 70° to the horizontal. Reducing the inclination increased start velocity without increasing total push duration. These were experimentally imposed settings, so they demonstrate a response to changing the plate angle rather than the settings athletes normally choose.
What senior athletes normally use: the studies cited here do not establish a representative range of preferred front and rear plate angles for senior men and women. Treat the tested angles as options for comparison, and record each athlete's preferred settings alongside repeated acceleration results.
Plate-angle evidence: Mero et al. (2006) and Valamatos et al. (2022). The 40° comparison comes from a small male sample and should guide individual testing. The overhead diagram shows spacing only; it does not depict plate inclination.
The Set Position
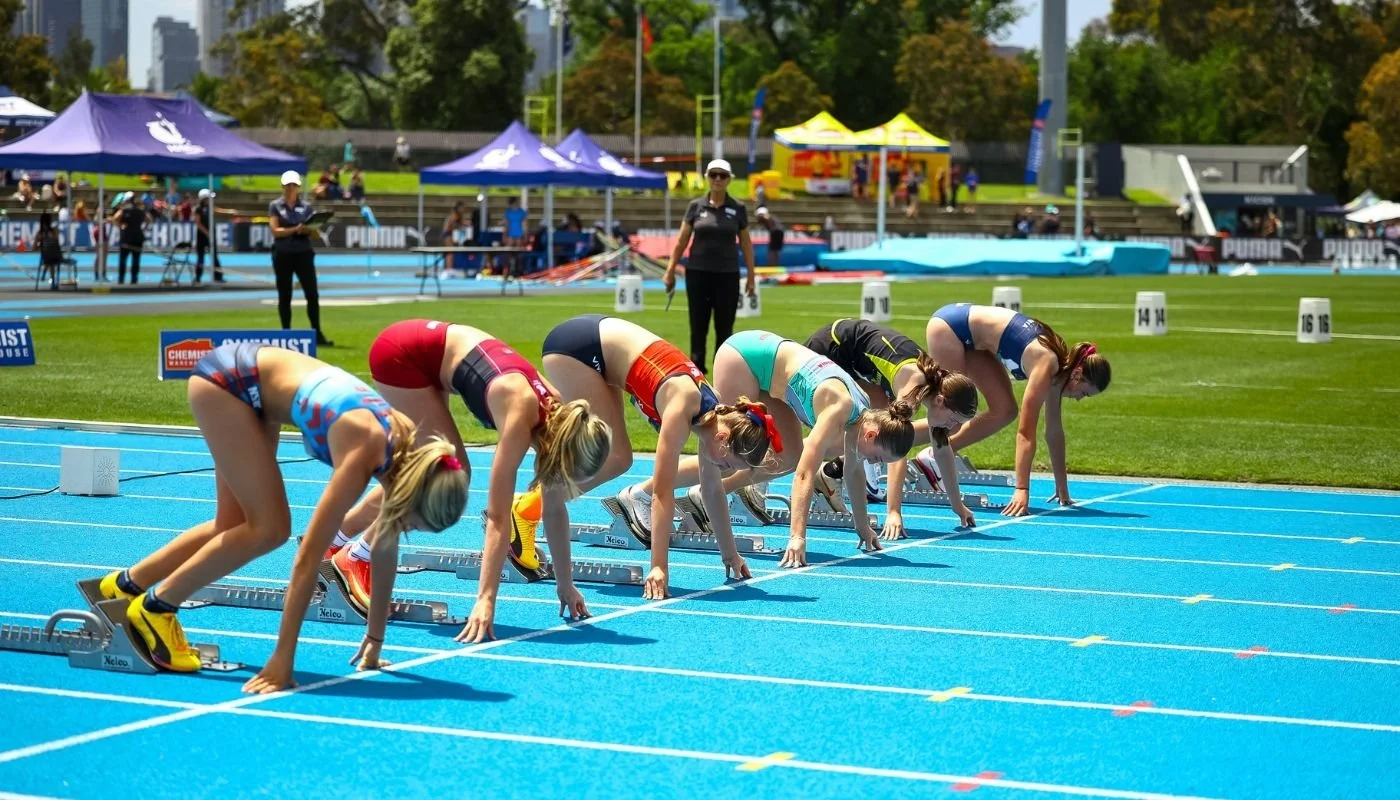
Different Positions Can Produce Effective Starts
World-class men and women observed in competition. Compare the front and rear knee angles in the set position.
How to read the angle
Measure between the thigh and shin at the knee. A larger angle means a more open knee. This sketch explains the measurement; it is not a target set position.
Teal = men · Gold = women. Dot = group mean. Line = mean ± one standard deviation (SD).
Source: Ciacci et al. (2017), world-class subgroups, as tabulated in Valamatos et al. (2022), Table A1. Exact ages and subgroup sizes are not shown in this summary; these data do not establish age-based targets for juniors.
Historically, sprint coaching favoured a medium spacing with approximately 90° at the front knee and 130° at the rear knee. Modern studies show considerably more variation, and the 2022 systematic review concluded that anthropometry and individual strength characteristics should inform the set position rather than forcing one geometry on everyone.
One small experimental study challenged the traditional rear knee recommendation. Eleven university sprinters produced greater horizontal block velocity with the rear knee set at 90° than at 115° or 135°, mainly because the rear leg contributed for a greater proportion of the push. Total block time did not increase. This makes a more compact rear leg worth testing when an athlete barely uses the rear block, but the study does not justify prescribing 90° to every sprinter.
Pressure Against the Footplates
Research on centre of pressure suggests that how the athlete loads the plate can matter as well as where the plate is positioned. More posterior pressure, closer to the heel, has been associated with better average horizontal external power in some athletes, but an intervention manipulating loading position did not improve everyone. A useful cue is therefore “load the whole plate” rather than forcing every athlete onto the toes or forcing the heel down unnaturally.
Force Application and Sequencing
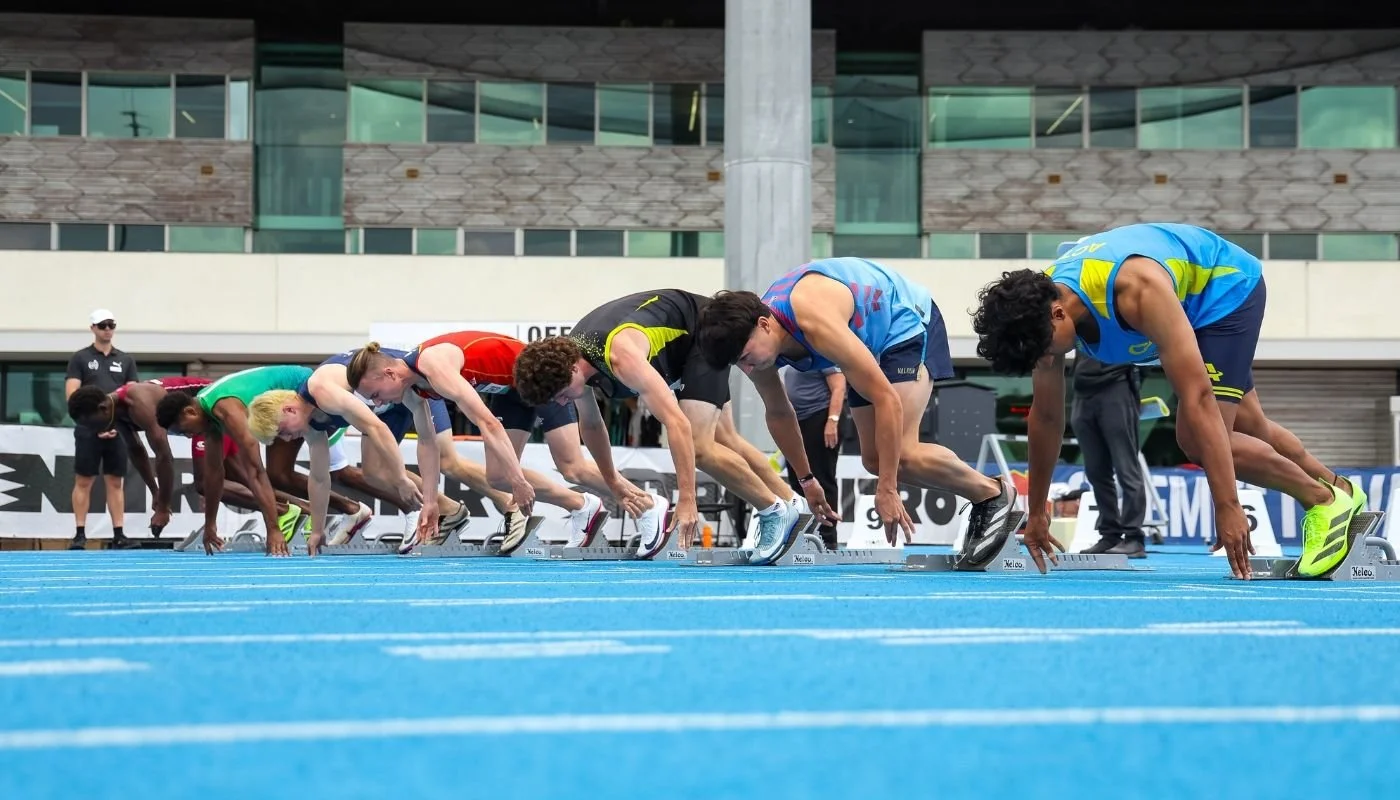
The key mechanical requirement is to produce substantial force in the forward direction during the limited time available. In 17 male sprinters averaging 10.67 s for 100 m, average horizontal force from the front and rear blocks together explained 86% of the variance in normalised average horizontal power. At joint level, rear ankle moment, front hip moment and front knee power together accounted for 55% of variance in that performance measure.
The hips are especially important during the block push. In another study of 10 male sprinters averaging 10.50 s, the hip produced about 61% of leg extensor energy in the rear leg and 64% in the front leg during block clearance. During the first stance, the ankle contribution became largest at about 42%. This supports a simple sequence for coaches: push from the hips in the blocks, then arrive on the ground ready to use the ankle and whole leg.
Front leg extension in 15 of 16 sprinters followed a proximal to distal sequence, while better block power was associated with faster front hip extension, longer relative rear leg push and greater rear hip extension. This is why “push the hips through” is generally more useful than telling an athlete to flick the feet rapidly from the blocks.
Carmelita Jeter: The Start in Slow Motion
Watch for: the rear foot leaving first, the continued front-leg push and the transition into the first ground contacts. Pause and replay to follow each event.
Footage labelled as Jeter's 2011 World Championships start, uploaded by MattyBDEPT. Use the side view to observe the sequence; video alone cannot quantify block forces.
Watch on YouTubeBoth Legs Push Strongly, then the Front Leg Keeps Pushing
At the start, the athlete pushes strongly against both footplates to drive forwards. The rear foot leaves its block first. The front leg keeps pushing after the rear foot has left, until the front foot also leaves its block.
Push strongly with both legs
Both feet press against their footplates as the athlete begins to drive forwards.
Both feet against the blocksKeep pushing with the front leg
The rear foot leaves first and moves forwards for the first step. The front foot stays against its plate while the front leg continues pushing.
Front leg still pushingLeave the front block
When the front leg finishes pushing, the front foot leaves its plate. Both feet are briefly off the ground before the first step lands.
Both feet have left the blocksSolid bars = foot remains against the plateDashed line = foot has left the plate
Diagram informed by Bezodis et al. (2015) and Brazil et al. (2017). It shows the order of events. The bar lengths do not show measured times or how much force each leg produces.
- Set
Stable and ready
Load both feet against the plates and hold a stable set position.
- Respond
React to the sound
Release the hands and split the arms as the push begins.
- Push
Use both legs
Accelerate the hips forward. The rear leg leaves first while the front leg continues pushing.
- Clear
Project forward
Leave the blocks with horizontal velocity and a short first flight.
- Contact
Put the first foot down
Aim for a useful contact under or behind the centre of mass, ready to push again.
- Accelerate
Connect the next pushes
Create horizontal impulse in the first stance, then repeat the pushes and rise gradually.
Follow the sequence from set to acceleration. Each phase prepares the next.
COM means centre of mass. Use the sequence to understand the mechanical intent of each phase.
The First Step
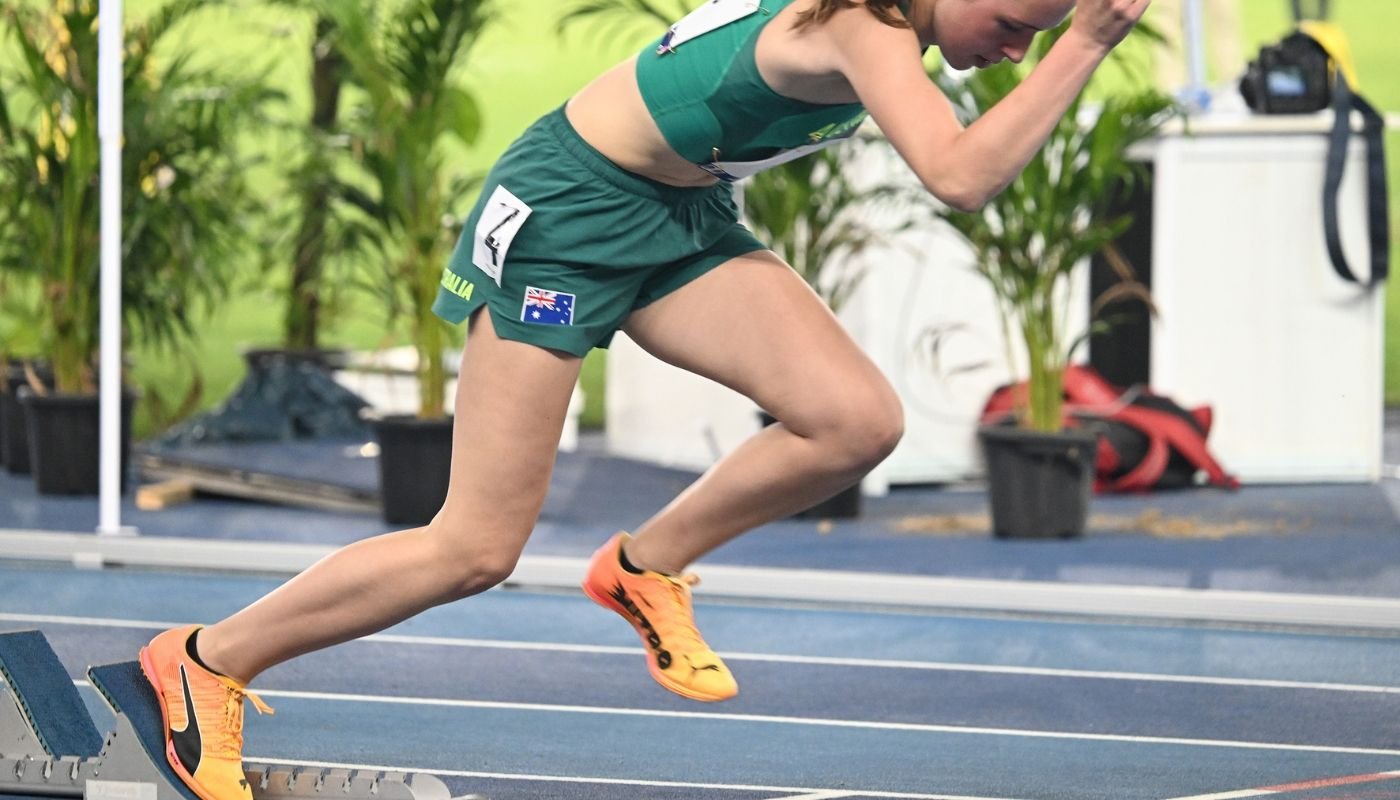
The first step should not be deliberately “long.” Step length is an outcome of block velocity, flight time, limb motion and body position. Across the literature, first step lengths vary widely even among good sprinters. The more useful question is whether the athlete arrives at the first contact in a position that allows another strong push.
A 2026 study of highly trained to world class sprinters found that placing the first foot further behind the centre of mass was associated with shorter contact times and greater average horizontal force. This does not mean athletes should claw aggressively backwards or deliberately land far behind themselves. It supports avoiding a reaching contact in front of the body.
How Long Is the First Step?
Use these reported values as context when reviewing video. They are not prescribed landing distances. The distances describe one step; a full stride comprises two steps.
Senior sprinters
The review labels these groups senior; this summary does not define an exact age band. Values span different studies and performance levels.
Separate observations from targets
The under-20 study below adds junior data. It does not establish targets for younger children or every athlete in an age group.
Source: Valamatos et al. (2022), section 4.2 and Table A4. Published endpoints: women 0.820–1.068 m; men 0.850–1.371 m. These span reported values, including group means; they are not population reference intervals. Measurement definitions differ between studies, so check the original protocol before comparing video distances.
Junior data: a comparison within one study
Aerenhouts et al. (2012) studied trained sprinters with at least three years of competition. Juniors were under 20 and had not grown taller in the previous year. Distances were recorded using Optojump during block-start sprints.
| Group | Athletes | Age, years (mean ± SD) | First step, m (mean ± SD) |
|---|---|---|---|
| Junior females | 19 | 18.1 ± 0.9 | 0.61 ± 0.20 |
| Senior females | 9 | 24.4 ± 2.7 | 0.82 ± 0.19 |
| Junior males | 23 | 17.8 ± 0.9 | 0.63 ± 0.27 |
| Senior males | 16 | 24.2 ± 2.1 | 0.85 ± 0.33 |
Source: Aerenhouts et al. (2012), Tables I and III. Converted from centimetres to metres. SD describes variation, not a recommended range.
Use this comparison carefully: these are late-adolescent trained athletes, not a sample of all children. Keep this study separate from the multi-study senior chart above: measurement definitions differ. Use the same measurement method when tracking an athlete over time.
Curve Starts: Compare the Line Out of the Blocks
The useful question is where the first pushes take the athlete, and how smoothly that path joins the bend.
A block rail is straight in every setup. Here, local tangent means the direction the lane points at the start; inward aim means rotating the rail towards the inside relative to that direction. Coaching descriptions such as “tangent to the curve” can also mean aiming from the outer side towards a point further around the inside line. Specify the starting position and the intended path rather than relying on the word “straight”.
Read the diagrams: overhead view, running from left to right around a left-hand bend. Dashed gold = rail direction extended; solid teal = illustrative athlete route. All three use the same lane outline. Curvature and angles are exaggerated for clarity; these are not scale drawings or measured trajectories.
Expert sources: Stephen Cowburn, Sprint Starts, edition 6 (2005), p. 10 recommends an outer-lane setup aimed towards a tangent to the inside line. His suggested straight opening of about 10–15 m is coaching guidance, not a validated target. Jeneba Tarmoh, World Athletics (2016) describes a slight inward angle and her own preferred inside-lane position at about 10 m. These accounts support exploring an inward entry; they do not rank all alignments.
What does the research establish?
The bend changes force demands. Millot et al. (2024) found lower forward force and impulse alongside greater sideways force in curve sprinting compared with straight sprinting. This supports examining how the athlete accelerates while turning. It does not prove that a straighter opening or a particular rail angle is faster.
Lane radius matters. Diaz, Alcantara and Grabowski (2024) studied nine competitive sprinters on straight paths and two curve radii. Radius affected maximum speed and inside/outside leg forces. The trials used no starting blocks and assessed running near maximum speed, so they cannot identify an optimal block alignment.
No direct winner established here. The sources located for this comparison do not provide a controlled head-to-head test of local-tangent versus outer-half inward block alignment. The strengths and weaknesses above combine attributed coaching guidance with clearly identified geometric reasoning. They are hypotheses to check with the athlete, not measured performance advantages.
Compare two setups, then follow the whole entry
- Keep the pedal setup familiar. Retain front-foot choice, spacing and plate inclinations while comparing rail alignment. Record both lateral position and direction; they are separate variables.
- Film the route. From behind and an elevated oblique view where practical, follow the first contacts and the transition into the bend. Look for outside drift, a rushed inward correction or a sideways reaching step. Never stand in the running lane to film.
- Time equivalent distances. Compare several starts in the same lane with full recovery and the same start procedure. Mark consistent 5 m and 10 m stations around the lane; changing the aim must not change the timing task. Include a longer run to check the join after 10 m.
- Keep a repeatable result. Prefer the setup that preserves or improves acceleration with a smooth entry and reliable lane clearance. Recheck in tighter and wider lanes. Do not require the athlete to reach the inside at a prescribed step or distance.
Explore the 200 M Block Start in 3D
Use the model to compare the first two alignments above: lane-tangent and outer-half inward. Change the lane to inspect the available entry space, then explore front-foot choice separately. Follow the block push into the first ground contacts. These are illustrative movement examples: the model does not predict a faster setup or establish an optimal angle for an athlete.
03 · Make it teachable
How to teach the start in simple language
Start with a small number of external, action oriented instructions. The athlete does not need a biomechanics lecture while kneeling behind the line. Give one priority, allow a high quality attempt, show the athlete what happened, and repeat. The 1993 biomechanical feedback study is particularly relevant here: individual changes to block position improved performance in seven of eight junior sprinters, and the authors emphasised performance feedback rather than chasing one universal position.
“Load Both Plates.”
Feel pressure through both feet. The athlete should feel ready to push immediately through both plates.
“Push the Ground Behind You.”
Direct effort backwards through the blocks so the body accelerates forward. Do not cue “jump out.”
“Drive Your Hips Through.”
This encourages the hip dominant block action found in kinetic studies without asking the athlete to think about individual joint angles.
“Push, then Leave.”
This discourages cutting the block phase short simply to appear fast out of the blocks.
“Step Down Underneath You.”
This discourages reaching and supports the body configuration associated with useful first step horizontal force.
“Push Longer than You Fly.”
The phrase is qualitative rather than literal. It reminds the athlete that early acceleration depends on applying force effectively during contact.
Noah Lyles: A Practical Block-Start Demonstration
Watch for: how Lyles establishes his setup, makes contact with the plates and moves from set into acceleration. Choose one feature to discuss before the next attempt.
Demonstration from Noah Lyles' channel. His settings and cues illustrate an individual approach; adapt them using the athlete's proportions, experience and repeated 5–10 m results.
Watch on YouTubeA Cue Hierarchy for Coaches
| Problem | First cue to try | If that fails | What not to say first |
|---|---|---|---|
| Rear leg does almost nothing | “Push both plates.” | Move the rear block slightly closer or trial a more flexed rear knee, then retime 5 m and 10 m. | “Your rear knee must be exactly 90 degrees.” |
| Athlete pops upward | “Push the track behind you.” | Check whether the blocks are too close, too steep or whether the athlete is cutting hip extension short. | “Stay low for seven steps.” |
| Long airborne first step | “Step down sooner.” | Use two step starts and mark where first contact occurs. | “Make the first step longer.” |
| First foot reaches in front | “Down underneath you.” | Shorten the task to one or two contacts and use side video. | “Pull harder with the hamstring.” |
| Very rapid but weak first contacts | “Finish each push.” | Time 5 m and compare a normal start with a deliberately calmer, stronger push. | “Quicker feet.” |
| Athlete stays artificially folded | “Keep pushing and let yourself rise.” | Run through 20 m rather than terminating after 5 m. | “Keep your head down.” |
| Inconsistent set position | “Same setup every rep.” | Mark block positions and rehearse “on your marks” and “set” without sprinting. | Several new technical cues at once. |
What Should Stay Individualised?
Leg length, limb proportions, strength, ankle mobility, preferred block leg, training history and an athlete's force producing strategy can all change which setup works best. Research has found benefits from different block spacings and loading manipulations in different groups, and not every athlete improves from the same intervention.
This is where a coach should resist the temptation to copy an Olympic champion frame for frame. Elite technique is useful for understanding principles, but the athlete in front of you has their own body and their own force capabilities.
-
Can the athlete set up the blocks consistently?
If no · work on thisTeach and mark a repeatable setup.
If yes: move to the next check.
-
Can they push strongly through both blocks?
If no · work on thisUse short starts over 1 to 3 contacts.
If yes: move to the next check.
-
Does first contact land in a useful position?
If no · work on thisUse two-step starts, side-on video and one cue.
If yes: move to the next check.
-
Is 5 to 10 m performance improving?
If no · work on thisChange one variable: spacing, plate angle, loading or cue. Retest 5 to 10 m before progressing.
If yes: extend to 20 to 30 m and add race commands.
04 · See what matters
How to observe, score and diagnose a block start
Use Two Views and an Objective Outcome
For routine coaching, a side view is the most useful starting point. Place the camera far enough away to reduce perspective distortion and capture the blocks plus at least the first two contacts. High frame rate video is preferable when available because many important events occur within tenths or hundredths of a second. A rear view can then show step width, unwanted lateral displacement and asymmetry. Research studies commonly use 200 to 250 Hz video for detailed block analysis, but coaching video does not require laboratory precision to identify large technical changes.
See Projection and Contacts
Set angles, hip movement, block extension, first flight, foot placement and how quickly the athlete rises.
See Direction
Look for unnecessary lateral movement, crossover or a forced narrow first step. Do not demand that every first step land on one straight line.
See Whether It Works
Use 5 m and 10 m splits where possible. Use the splits to check whether the technical work improves acceleration.
Observation Checklist
- Before “set”: block positions are repeatable and secure; athlete knows which leg is front.
- At “set”: both feet are firmly loaded; hands are stable; athlete is balanced enough to remain still rather than hanging desperately from the fingertips.
- At the sound: no anticipatory rocking; hands release cleanly; arms split while both legs begin producing force.
- Rear block: the rear leg visibly contributes rather than immediately collapsing or flicking free.
- Front block: the athlete continues pushing after the rear foot leaves; hips move forward through substantial extension.
- Block exit: the athlete travels forward rather than jumping markedly upward.
- First flight: brief and controlled. The athlete does not hang in the air searching for distance.
- First touchdown: foot contacts near or behind the vertical projection of the centre of mass rather than reaching clearly ahead.
- First stance: the athlete spends enough time applying useful force; contact is not artificially chopped short.
- Early steps: step length increases naturally and posture rises progressively rather than suddenly.
- Outcome: the same technical change improves or at least preserves 5 m and 10 m performance across several trials.
A Simple Coaching Score
This rubric is a practical coaching tool created from the evidence reviewed here. It has not been validated as a scientific test. Its purpose is to structure observation and stop coaches from judging the start on one favourite visual feature.
| Criterion | 0 · Needs attention | 1 · Functional | 2 · Strong |
|---|---|---|---|
| Repeatable setup | Block settings or body position vary repeatedly. | Mostly repeatable. | Setup is stable and reproducible. |
| Stable set and response | Rocking, obvious anticipation or delayed movement. | Stable but response or coordination varies. | Still before signal; coordinated response. |
| Both blocks contribute | Rear foot escapes with little push or front push collapses. | Both contribute, but one phase is visibly weak. | Clear early rear contribution and sustained front push. |
| Forward projection | Large upward jump or collapse. | Reasonable forward travel. | Strong forward movement with useful hip extension. |
| First flight | Long floating phase. | Acceptable. | Short, controlled repositioning. |
| First contact | Clear reach in front of body. | Near the centre of mass. | Contact beneath or slightly behind COM with immediate support. |
| Acceleration rhythm | Forced quick steps, sudden rise or obvious braking. | Generally progressive. | Strong pushes, controlled flight and gradual rise. |
| Performance outcome | Change makes 5 m or 10 m clearly worse. | Performance unchanged or inconsistent. | Repeated improvement with acceptable consistency. |
Interpretation: 13 to 16 points suggests a robust start with smaller refinements appropriate. 9 to 12 suggests a functional start with one or two priorities. 8 or below suggests simplifying the task and rebuilding a key constraint. These cutoffs are coaching heuristics, not normative standards.
Investigate the Cause of the Movement
| What you see | Possible cause | What to test next | Evidence logic |
|---|---|---|---|
| Athlete “pops up” immediately | Weak horizontal force strategy, ineffective setup, cut short push, or simply insufficient force capacity. | Compare normal setup with small spacing adjustment; cue “push behind”; time 5 m. | Horizontal force and power are strongly related to block performance. |
| Rear leg leaves almost instantly | Rear block too far away, knee too open, or athlete has learned to ignore rear block. | Bring rear block slightly forward or trial greater rear knee flexion. | A 90° rear knee increased rear push duration and horizontal velocity in one small experiment. |
| Large first step but poor 10 m time | Too much flight or reaching ahead. | Ask for an earlier “down” first contact and compare timing. | Faster athletes commonly combine shorter flight with useful early contact time. |
| Very quick first contacts but little acceleration | Athlete is prioritising turnover over impulse. | Cue “finish the push”; use 10 m rather than step frequency as the outcome. | Longer early contacts can occur in faster sprinters because they permit force production. |
| Foot lands well in front of hips | Overreaching or insufficient body projection. | Two step start; cue “down underneath”; side video. | More posterior first contact relative to COM is associated with greater average horizontal force. |
| Athlete leaves blocks quickly but 10 m is worse | Block clearance has been optimised at the expense of subsequent acceleration. | Return to full 10 m measure; compare power and split rather than block time alone. | Block velocity and 10 m improvement do not necessarily move together. |
05 · Practice design
Drills and progressions that transfer back to the blocks
The most specific way to improve a block start is to practice high quality block starts. In 14 sub elite male sprinters, block starts produced 5 m times about 5% faster and 10 m times about 3.5% faster than split stance standing starts, with greater propulsive and net anterior posterior impulse through the first four steps. Simpler starting drills remain useful as teaching tools, but they should lead back to the actual competition skill.
Block Setup and Freeze
- Objective
- Make the setup repeatable and let the athlete feel pressure through both plates.
- Setup
- Competition blocks. Athlete completes “on your marks” and “set,” holds for two to three seconds, then relaxes without sprinting.
- Coach
- Check hand position, stability, foot contact and whether the athlete can feel both blocks. Record exact rail positions.
- Common errors
- Rear foot barely loaded; hips moved to an uncomfortable height; shoulders wandering forward during the hold.
- Regression
- Practice one knee down and block entry before adding the set position.
- Progression
- Add a sound and one controlled push from the blocks.
One Step Push
- Objective
- Teach “push before step” and expose whether the rear block contributes.
- Setup
- Full blocks. Athlete responds to a signal and completes the block push plus first contact, then stops safely.
- Coach
- Look for hips traveling forward, rear foot leaving after a real push, and first foot landing beneath the advancing body.
- Common errors
- Jumping upward, flicking rear foot away, deliberately reaching the first step.
- Regression
- Three point start over one step.
- Progression
- Add the second and third contacts.
Three Step Block Start
- Objective
- Connect block clearance to the first three force producing contacts.
- Setup
- Blocks plus a clear stopping zone. Perform three hard contacts, then smoothly decelerate.
- Coach
- “Push, step down, push again.” Watch flight time and whether the feet reach ahead.
- Common errors
- Athlete treats it as three fast taps; torso is deliberately held down; step length is forced.
- Regression
- One step push.
- Progression
- 5 m maximal block start.
Timed 5 M and 10 M Starts
- Objective
- Connect technical changes to actual acceleration.
- Setup
- Blocks with timing gates where available. Record at least three quality trials of the current setup before comparing a change.
- Coach
- Change only one variable at a time: block spacing, plate inclination, loading strategy or one cue.
- Common errors
- Changing three things together; deciding from one rep; judging only block clearance.
- Regression
- Use video and a marked 5 m line if gates are unavailable.
- Progression
- 10 m plus 20 m to confirm the new start continues into acceleration.
This approach closely matches the logic of the biomechanical feedback intervention in which seven of eight sprinters improved.
Light Resisted Block Start
- Objective
- Increase the demand for horizontal force while preserving recognizable acceleration mechanics.
- Setup
- Use a sled or other safe resisted sprint device. Begin conservatively and compare the movement with unresisted starts.
- Coach
- The athlete should still push through the blocks and progress into normal acceleration rather than grind with dramatically altered steps.
- Common errors
- Excessive load, long block time, severely shortened steps or using resistance instead of practicing actual starts.
- Regression
- Unresisted 5 m start.
- Progression
- Contrast one resisted start with one unresisted start.
Acute research found approximately 10% body mass resistance preserved most measured start kinematics better than 20% in one small study. More recent reviews suggest resisted sprint training can improve short acceleration, but there is no universally optimal load and unresisted sprinting remains essential.
Variable Command Starts
- Objective
- Develop a stable set and genuine response to the signal without rehearsing one predictable cadence.
- Setup
- Use normal race commands. Vary the legal pause before the sound. Run 10 to 20 m.
- Coach
- Reward stillness before the sound and quality movement after it. Avoid turning every start into a reaction time contest.
- Common errors
- Guessing the signal, creeping in set, or rushing the first push because the athlete is obsessed with reaction time.
- Regression
- Known cadence with longer pause.
- Progression
- Head to head starts or small competitive sets with full recovery.
Elite reaction times commonly fall around 0.120 to 0.150 s, but start performance also depends on what happens after reaction.
Drills to Use Carefully
Wall drills, falling starts and three point starts can simplify posture, rhythm or force direction, particularly for beginners. Use them as regressions or teaching constraints that prepare the athlete for block starts. Actual block starts create different early acceleration kinetics, which is why athletes must regularly return to the competition skill.
Step marks can provide a useful visual reference but should not become targets that make an athlete reach. The literature shows substantial variation in first step length even among elite performers. Use a mark to detect an unusually long flight or a sudden change in the athlete's usual contact position.
“Stay low” drills should be replaced with tasks that create continued acceleration. Athletes should rise as their speed and force orientation change. Forcing the head or torso downward can produce a shape without solving the mechanical problem.
06 · Apply it over time
A sample eight week block start development plan
Adapt this sample plan to the individual athlete. It assumes two high quality sprint exposures per week, placed when the athlete is sufficiently fresh to sprint with intent. The priority is quality rather than accumulating large numbers of fatigued starts. The precise number of repetitions, recovery periods and weekly placement should be adjusted to the athlete's training age, competition schedule, health, event demands and total sprint load.
| Week | Main objective | Session A | Session B | Coach measures | Progress when... |
|---|---|---|---|---|---|
| Week 1 | Baseline and setup consistency | Block setup rehearsal. 3 × 2 starts over 10 m. Film side view. | 3 × 5 m plus 3 × 10 m from normal blocks. | Exact block settings, 5 m, 10 m, side video, scoring rubric. | Set position is repeatable and baseline timing is stable enough to compare changes. |
| Week 2 | Use both blocks | One step and three step starts, then 4 × 5 m. | 2 sets of 3 × 10 m. Trial one small rear block or knee angle adjustment if needed. | Rear leg contribution, hip movement, 5 m split. | Athlete can push through rear block without damaging front block push or 10 m outcome. |
| Week 3 | Forward projection and hip extension | 3 × three step starts; 4 × 10 m. | 4 × 10 m plus 2 × 20 m. | Block exit video, first flight, first touchdown position. | Less upward displacement or reaching, with equal or better timing. |
| Week 4 | First contact and continued acceleration | 2 × one step, 3 × 5 m, 3 × 10 m. | 4 × 20 m from blocks. | First foot relative to body, first three contacts, 10 m and 20 m. | First contact supports another push instead of visible braking. |
| Week 5 | Overload horizontal force | Optional 3 to 4 light resisted 10 m starts, each paired with an unresisted 10 m start. | 3 × 10 m plus 3 × 20 m unresisted. | Technique under resistance, unresisted 10 m response. | Resistance does not create an obviously different movement strategy and unresisted performance remains strong. |
| Week 6 | Reaction without anticipation | 6 × 10 m with variable command intervals, then 2 × 20 m. | Head to head starts: 2 sets of 3 × 10 to 15 m. | Stillness in set, response consistency, 10 m. | Athlete responds rather than guesses and preserves the technical model under pressure. |
| Week 7 | Competition integration | 4 × 20 m from full commands plus 2 × 30 m. | 3 to 4 race modelled starts over 20 to 30 m with full recovery. | 10 m, 20 m, start consistency, athlete rating of confidence. | The best training mechanics survive full commands and competitive intent. |
| Week 8 | Reduce volume and retest | 4 to 5 crisp 10 m starts early in the week. | Formal retest: at least 3 × 10 m and 2 × 20 m using the established setup. | Compare Week 1 and Week 8 timing, video and rubric under similar conditions. | Keep only changes that improve performance, repeatability or both. |
What Should Improve Across the Block?
Expect the first improvements to be repeatability and clarity: the athlete knows exactly where the blocks go, can settle into set without searching, and understands one or two useful cues. Performance gains may then appear through greater horizontal force, a better rear block contribution, a more effective first contact or simply less variability. The intervention evidence supports this individual trial and feedback process rather than a single prescribed set position.
What to Test Before and After
10 M Time
Simple, highly relevant and captures more than the block clearance itself. Use the same timing method and start procedure at both tests.
5 M Time
More sensitive to the block phase but also more vulnerable to timing error. Electronic timing is strongly preferred when possible.
Video and Rubric
Use identical camera positions where possible. Review the movement alongside the timing result.
07 · What the research really supports
Competing technical models and key studies
Competing Models of the Block Start
| Model | Typical idea | What supports it | Limitations | Best coaching use |
|---|---|---|---|---|
| Classic angle model | Medium block spacing, roughly 90° front knee, 130° rear knee, powerful low projection often described historically as about 40° to 45°. | The classic 1997 review synthesised the evidence available at the time. | Modern evidence shows large successful variation. “45°” can refer to different angle definitions and is easily misapplied as a rigid torso target. | An introductory reference to adapt through individual testing. |
| Compact rear leg model | More flexed rear knee and relatively compact spacing to give the rear leg more time and range to push. | Rear knee at 90° improved horizontal block velocity versus 115° and 135° in 11 university sprinters. | Small sample; many elite sprinters naturally use rear knee angles above 100°. | Worth testing when rear leg contribution appears very short or ineffective. |
| Anthropometry informed model | Use leg length to establish block distances rather than fixed centimetres or shoe lengths. | In 36 sprinters, a front block distance near 50% leg length with 45% interblock spacing improved performance mainly through greater rear block force. | One configuration cannot capture all strength, mobility and tissue loading differences. A 2026 modelling study raises load related questions. | Strong starting point for testing. |
| Horizontal power model | Judge the start by the rate at which the athlete accelerates their body horizontally. | Horizontal force strongly explains normalised average horizontal power; hip extension and both block contributions matter. | Direct power measurement requires equipment not available to most coaches. | Translate to 5 m and 10 m timing plus video. |
| Individual outcome model | Manipulate one setup variable, collect immediate feedback and retain the option that improves the athlete's acceleration. | Seven of eight junior sprinters improved following individualised biomechanical feedback. COP manipulations also show athlete specific responses. | Requires disciplined testing and enough repetitions to separate signal from normal variation. | Best overall coaching framework. |
Key Studies and What Coaches Can Actually Take from Them
| Study | Participants / design | Main finding | Coaching meaning | Evidence caution |
|---|---|---|---|---|
| Valamatos et al., 20221 | Systematic review of 36 sprint start studies. | No single set position explains elite performance. Anthropometry, rear block force, hip extension, short flight and early horizontal force are recurring factors. | Coach principles and outcomes rather than copying one posture. | Underlying studies use different methods, levels and definitions. |
| Harland & Steele, 19972 | Biomechanical review. | Established the classic medium spacing, approximately 90°/130° knee reference and horizontal force emphasis. | Useful historical baseline. | Predates most modern instrumented and world class research. |
| Mendoza & Schöllhorn, 19933 | Eight top junior sprinters; individualised feedback intervention. | Seven improved after technical adjustments. 10 m improvement did not simply track block takeoff velocity. | Change one variable, measure the whole start. | Small sample and older measurement technology. |
| Mero et al., 20064 | Nine male sprinters; 40° versus 65° plate angle. | 40° produced greater block velocity, 3.39 versus 3.30 m/s. | Lower plate angles are worth testing. | Small male sample and only two conditions. |
| Milanese et al., 20145 | Eleven university sprinters; rear knee 90°, 115°, 135°. | 90° produced greater horizontal block velocity and longer relative rear leg push without longer total block time. | More rear knee flexion can be tested when rear contribution is poor. | Do not convert a small experiment into a universal 90° rule. |
| Bezodis et al., 20156 | 16 sprinters from 9.98 to 11.60 s. | Front proximal to distal extension and greater rear hip extension were related to block power. | “Drive the hips through” has a strong biomechanical basis. | Cross sectional relationships do not prove a cue will improve every athlete. |
| Brazil et al., 20177 | 10 male sprinters, mean PB 10.50 s. | Hip generated 61% to 64% of leg extensor energy in the blocks; ankle contribution dominated first stance at 42%. | Block push is strongly hip driven; first stance requires effective ankle and whole leg behaviour. | Male trained sample. |
| Brazil et al., 20188 | 17 male sprinters, mean PB 10.67 s. | Front and rear average horizontal force explained 86% of variance in normalised average horizontal power. | Force direction is more important than cosmetic posture. | A laboratory performance metric; the study did not test a coaching intervention. |
| Ciacci et al., 20179 | 20 elite and world class men and women observed in competition. | Faster performers had lower CM in set, longer pushing, lower vertical exit velocity, longer early contact and shorter flight. | Do not confuse “faster start” with “shorter everything.” | An observational association that requires individual testing before coaching application. |
| Macadam et al., 201910 | 14 sub elite male sprinters; blocks versus standing split stance. | Blocks were 5.0% faster at 5 m and 3.5% at 10 m, with greater propulsive impulse across the first four steps. | Practice actual blocks regularly. | Differences disappeared by 20 to 30 m in this group. |
| Cavedon et al., 202311 | 36 sprinters; front block 50% to 70% leg length with 45% interblock spacing. | Shorter settings near 50% increased rear block force and improved start performance. | Use leg length to create a rational testing range. | Not proof that 50/45 is optimal for every athlete. |
| Stewart et al., 202612 | Highly trained to world class sprinters; first step kinetics. | Foot positioned further behind COM at initial contact correlated with greater average horizontal force and shorter contact time. | Avoid reaching the first foot ahead of the body. | Correlation should not become an instruction to exaggerate posterior foot placement. |
| Lu et al., 202613 | 28 elite sprinters; finite element tibial model across three front block distances. | Block distance changed modelled internal tibial loading, with sex by distance interactions. | Consider tolerance and health as well as the fastest acute setup. | Modelled tissue loading does not establish actual injury risk. |
Where There Is Still Genuine Disagreement
Rear knee angle: the traditional model favours roughly 130°, while experimental work found 90° advantageous in a small group. Both can be “right” in context. A more flexed rear knee offers a longer potential push, but the athlete must possess the strength and coordination to use it. Compare the options through repeated starts.
Block spacing: older literature often favoured medium spacing; newer anthropometry driven work supports relatively compact front block positions that increase rear leg contribution. Different studies also define spacing differently, making simple centimetre comparisons misleading.
How quickly to leave the blocks: it sounds intuitive that a shorter block time must be better, but faster sprinters can deliberately or naturally spend more time generating force. The aim is to find an effective balance between impulse and time.
First contact time: later in maximal velocity sprinting, short ground contact is a hallmark of high speed. During the first steps, however, the athlete needs time to create a large horizontal impulse. The same coaching rule should not be applied blindly to both phases.
The “45 degree rule”: older descriptions refer to a low projection angle around 40° to 45°, while modern centre of mass velocity measurements can be around 10°. These numbers measure different things. A coach should not draw a 45° line over the athlete's torso and call it optimisation.
The Coaching Model in One Sentence
Suggest an addition or correction
Share a coaching observation, suggest an improvement or point us to relevant research. Contributions are sent privately for editorial review and do not appear automatically.
